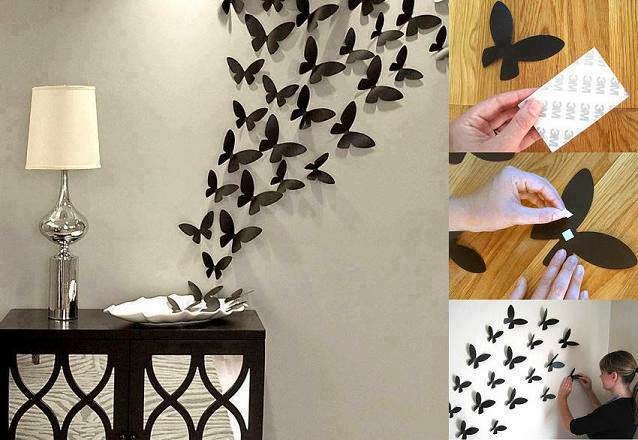
Learn How To Fold Butterflies Out Of Paper

As you
already know paper is one of the essential supplies when it comes to DIY
projects. You can create almost anything out of it, from gift cards to bags and
even some smaller pieces of furniture. But still, one of the most intriguing
techniques when it comes to paper is the origami or paper folding. The great
thing about it is that you basically start with a simple piece of paper, but
the result is something amazing. So today, you are going to learn how to fold
butterflies out of paper, which you can afterwards use in your future craft
projects.
You
will only need a piece of paper that has the following size: 13x13 cm. Take the
paper and fold it in half. Unfold the paper and fold it again, the opposite way
you did it first. After this unfold again.
Turn the paper with its bottom up and fold it diagonally. Unfold, then
fold it the opposite way and unfold again. Take the sides and push them in the
middle of the square. Fold the sides of
the paper towards the middle and turn the paper again and rotate it 180
degrees. Fold its bottom to the upper part and pull the tip to the opposite
side. Try and not to push the sides of the paper down. Take the butterfly and
fold it in the middle and that is all. You can use the folded butterfly to
decorate a gift you bought for someone’s birthday or make several butterflies
and hang the somewhere in your room.


Learn How To Make a Stylish Gift Bag Out Of Newspaper
You know that annoying thing, when buy a gift for someone and you also having to buy a gift bag too? And it also happens a lot of times that someone simply forgets to buy a gift bag. Then a search begins in your home, when you try to find a gift bag that you have from someone else, just to have something to place your gift in. So this next tutorial will come in handy and will save the day, as you will learn how to make a stylish gift bag out of newspapers.

You will have to prepare:
- newspaper sheets;
- cutter and ruler;
- cardstock;
- paper glue;
- cord;
- hole punch;
Place two
sheets of newspaper on the top of each other. Using two layers of newspaper
will make your gift bag last longer. The sheets used in the tutorial have the
following size: 5 inch tall, 4.5 inch wide and 3 inches deep, but you can
change the dimensions of your bag. If you want your bag to have the same
dimensions and the one in the pictures, follow the instructions in the tutorial
( the picture with a diagram) and cut out a rectangle from the paper. Start
folding a piece of the paper from the top and one from the bottom and join the
two sides. Cut two pieces of cardstock to make the rim of bag and make it more
stable. Secure it with glue and fold the bottom of the bag. Apply glue on the
bottom of the bag. Cut another piece of cardstock and place it on the bottom of
the bag, then secure with glue. Punch holes in the top part of the bag and
insert a cord in the holes to make the handles of the gift bag. See how easy
and cheap it is to make a gift bag? You can be sure that it will be much more
appreciated, than a regular store bought bag.
Source:HowAboutOrange
Mosaic Effect For New And Stylish Cans

Everyone of
us has all kinds of cans lying around in our home. These cans can all be
recycled and used for another purpose. But simply using the cans the way they
are is not very attractive, so you will need to give them a makeover. After
that you can proudly store your pencils and craft supplies in your new and
stylish cans. To make these cans you will need:
- cans of different sizes;
- styrofoam;
- acrylic paint;
- hot glue gun;
- cutter;
- grout;
- a sponge;
- varnish;
Clean the cans and remove all the labels. Apply a
coat of white acrylic paint and let it dry. When the paint has dried, apply a
second coat of paint. Cut out small tiles from the styrofoam and paint them in
different colors. This will give a mosaic effect to the cans. Glue the tiles to
the can, using the hot glue gun. Make sure to leave some space between the
tiles as you will be applying grout there. Put a glove on your hand and apply
the grout on the cans and spread it. Make sure to cover all the holes between
the tiles, then let the grout dry for 30 minutes. After this remove the surplus
of grout, by using a dry sponge. Don’t worry if you have grout on the tiles and
this can be removed the next day with a damp sponge. Add a coat of varnish to
finish the cans. Find a nice place for it on your desk and place your pens and
scissors inside.

Source:Instructables
DIY - Personalized Set Of Coasters
Don’t you just hate it when your furniture gets all stained from the bottom of the glasses you put on it? You can avoid this by using coasters and placing your drink on them. This way you’ll protect your furniture. But coasters come in so many shapes and colors and this can make it hard to choose the right one. So instead of wasting time trying to find the perfect coaster, try and make them yourself. Just follow this simple tutorial below and you’ll have a brand new and personalized set of coasters.

Photo:TheCraftedLife
The whole
project will take around 2 hours and you will need:
- four of five ceramic tiles;
- alcohol based ink;
- alcohol;
- sealer;
- one paintbrush;
- paint (different colors);
- rubber pads (for the bottom of the coasters);
Start by applying a coat of alcohol on the ceramic
tiles. You can use regular drugstore alcohol as it is much cheaper and works
just fine. When you are done with this step, drip small spots of ink on the
tiles. Before proceeding to the next color, let the ink dry a bit and this way
the colors will blend nicely with each other. Add several colors until the
whole surface of the ceramic tile is covered. If you happen to add too much
color, just use a paper towel to clean the surplus. When the surface is dry,
seal your coasters. Let the sealer dry and paint the sides of the coasters,
using the paintbrush. This will make your coasters look more clean and will
also cover any ink that was left on the sides. Let the coasters dry and you can
start using them the same day. Pretty simple and quite impressive.
Source:TheCraftedLife
Bacon Turtle Cheese Burgers
If clogging your arteries is the main outcome of the meals you ingest, than you will be delighted by this next recipe! Cooking fat-free and with consideration to our weight and health is something we probably all should do. But once in a while, we can indulge in an absurdly greasy snack. Be careful though, this is not for the poorly-hearted. And even though people might think it’s a little disturbing, nothing beats the looks of eating a real burnt turtle but the incredible taste of bacon, cheese and meat mix. In order to cook some of these burgers, grab:
• two six-packs of hot-dogs sausages;
• half a kilo slices of bacon;
• a couple packs of cheese (sliced);
• a pack of meat;
• toothpicks;

Begin by building your burger with meat and cheese. The bacon should be used like bread buns, so make sure the slices cover the whole surface of your burger. Now, with the content properly preserved, you would want to put in the pieces which make this kind of burger into a disturbingly delicious turtle. You will need three pieces of hot-dog sausages per burger; or just a couple of long ones. Cut them in order to end up with 4 feet, a head and a tail. Take a knife and fashion the fingers and tail of the turtle. Secure shut all of your contents with the bacon and some toothpicks. Throw onto the grill until the sausages become crispy and your bacon gets a nice golden brown color. Enjoy!
DIY Weave Drinking Straws Into Baskets
Did you know you could use a straw for other things besides drinking? With only a couple of dollars and a rather patient personality, you are able to design this kind of handmade awesomeness. Today we present you with a DIY challenge: try to weave a basket out of drinking straws. It might seem hard, but with a picture tutorial, it will feel much easier. Here is the list of necessary materials:
· a bunch of straws;
· some small paper clips;
· a pair of scissors;

First, cut the straws into equal
size smaller pieces. Fold them up in a similar way we did in the first image.
Then, continue with attaching the other pieces of straws. You should have a
bunch of 4 interlacing squares with one smaller square gap here and there.
Check the photo for guidance. Some paper clips will help you tighten the loose
ends, so your structure won't fall apart. Next, tie the other side to the
whole. When you're done with all sides and have reached the top, use a scissor
to cut off the ends of the straws. Done!
Lego Storage Solutions
Kids' toys are their treasures. They will fight over it, they will cry if they lose some. The backbone of every child's development is a decent amount of playtime and nourishment. But at a point, you will lose control of where each toy is and how soft was the carpet without them lying around. When you reach that point, you will want to have read this tutorial. We'll show you how easily it is to store Lego blocks. Actually, how simple it is for you, not your kid, to build a system that will keep Lego blocks neatly and in order. Sure, you can buy an all plastic kids toy storage organizer from Amazon, but it's way simpler to make one. Jus take any drawer or bookcase which you will normally use to place your TV on and transform it into a perfect toy organizer. A few plastic trays or baskets are necessary. Just drill some slots into the sides of the shelves and push the trays in them. Stick some labels (or draw directly onto) with the appropriate definition of what they contain. Yellow for the yellow blocks, wheels for the wheels and so forth and so on. Now all you have to do is pick up every toy after your child is done playing. Now, you didn't expect the storage organizer to magically make your kid more organized? Have fun!

>> Amazon – Kids toy storage organizer <<

>> Amazon – Kids toy storage organizer <<
Abonați-vă la:
Postări (Atom)


